Digilent社에서 발매한 Arty Z7-20 board에 PetaLinux 올리기 #2.
※ PetaLinux build의 단계
1) PetaLinux build tools 설치
2) PetaLinux source code 압축 해제
3) PetaLinux build 환경 설정
4) PetaLinux project 생성 및 기본 설정
5) PetaLinux build
6) PetaLinux boot image 생성
7) PetaLinux image download 및 Board booting
3. PetaLinux build 환경 설정

PetaLinux build를 위한 script 실행등 작업에서 bash shell을 사용해야 함.
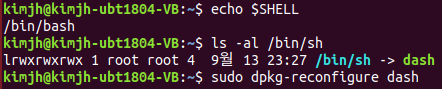
Shell 확인을 위해 echo $SHELL을 실행해보면 /bin/bash로 나오지만 Ubuntu 기본 값은 dash로 다음과 같이 확인할 수 있음.
~$ ls -al /bin/sh
lrwxrwxrwx 1 root root 4  9월 13 23:27 /bin/sh -> dash
PetaLinux build를 위한 bash shell 변경 방법은 다음과 같이 진행
~$ sudo dpkg-reconfigure dash명령을 입력하고 dash 설정 창이 뜨면 <아니오>를 선택해서 dash를 bash로 변경한다.
굳이 해석을 붙여놓자면 Ubuntu 기본 shell로 dash를 사용할 지 묻는 것으로 <예>를 선택하면 dash를 <아니오>를 선택하면 bash를 사용하도록 설정 변경 된다.
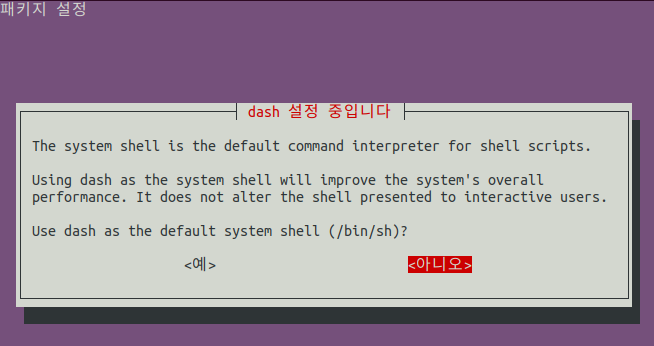

<아니오>를 눌러 dash에서 bash로 변경, ls -al /bin/sh로도 bash 변경 확인.
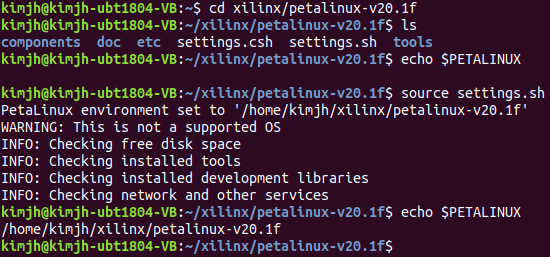
~$ cd xilinx/petalinux-v20.1f
~/xilinx/petalinux-v20.1f$ ls
components  doc  etc  settings.csh  settings.sh  tools
~/xilinx/petalinux-v20.1f$ echo $PETALINUX

~/xilinx/petalinux-v20.1f$ source settings.sh
PetaLinux environment set to '/home/kimjh/xilinx/petalinux-v20.1f'
WARNING: This is not a supported OS
INFO: Checking free disk space
INFO: Checking installed tools
INFO: Checking installed development libraries
INFO: Checking network and other services
kimjh@kimjh-ubt1804-VB:~/xilinx/petalinux-v20.1f$ echo $PETALINUX
/home/kimjh/xilinx/petalinux-v20.1f
$PETALINUX 경로를 확인하면 등록된 경로가 없음. PetaLinux 압축 해제 directory에서 source settings.sh 명령으로 script 실행 후 다시 확인해보면 $PETALINUX 경로로 압축해제 해놓은 /home/[user-acount]/xilinx/petalinux-v20.1f가 등록 되었음을 확인.
4. PetaLinux project 생성 및 기본 설정
Project build를 위한 directory를 하나 생성하고 petalinux-create 명령으로 project를 생성한다.
~/xilinx/project$ petalinux-create --help

petalinux-create --help로 확인해보면 -t 또는 --type 옵션은 type으로 project, apps, modules 등으로 설정한다.
--template 옵션에서는 cpu 종류(platform)등을 지정, -n 또는 --name 옵션으로 project의 이름을 지정 (지정 이름으로 directory가 생성됨)
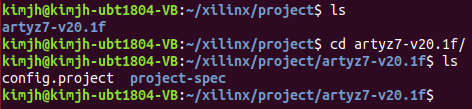
~/xilinx$ mkdir project
~/xilinx$ cd project
~/xilinx/project$ petalinux-create -t project --template zynq -n artyz7-v20.1f
petalinux-create 명령 실행 후 -n 옵션에서 지정한 값대로 artyz7-v20.1f directory 생성 되었음을 확인
다음으로 petalinux-config 명령을 통해 build 환경 설정 실행 및 저장하기
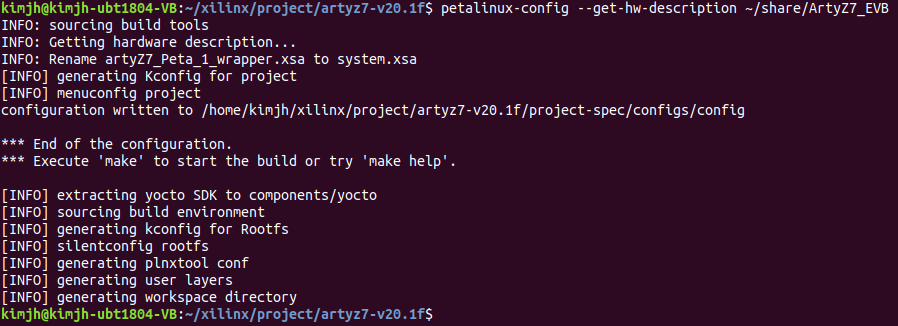
~/xilinx/project/artyz7-v20.1f$ petalinux-config --get-hw-description ~/share/ArtyZ7_EVBArty Z7-20 board의 hardware 설정 사항이 저장된 xsa file이 저장된 위치를 --get-hw-description 옵션을 통해 지정해줌

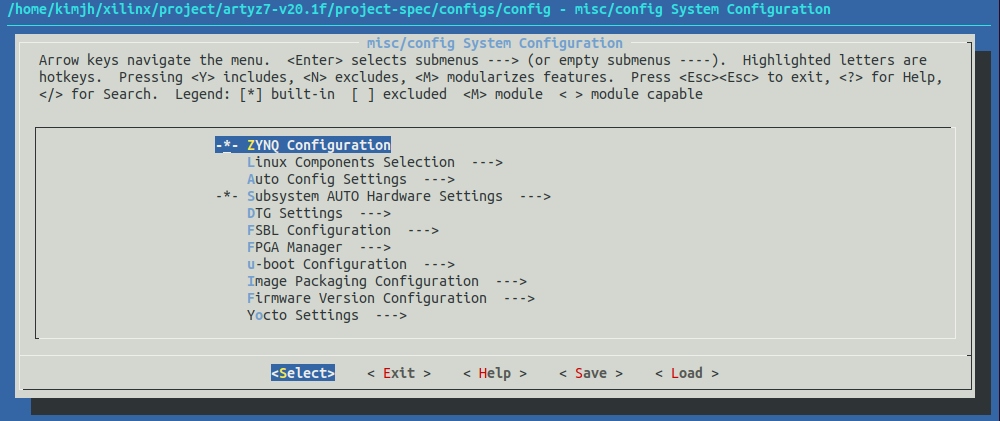
옵션 내용에서 특별히 변경할 내용은 없으며, <Exit>를 눌러 옵션 설정 창 종료하기.

5. PetaLinux build
petalinux-build 명령으로 Boot image build를 시작. 제법 긴 시간이 소요되며, PC 성능에 따라 소요 시간이 달라짐.
~/xilinx/project/artyz7-v20.1f$ petalinux-build
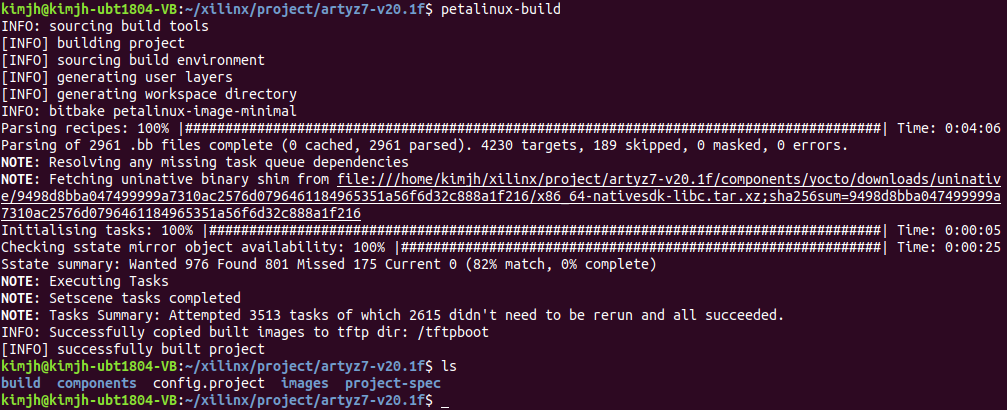
build 작업이 완료되고 build, components, images 3개 directory가 생성되었음.
6. PetaLinux boot image 생성
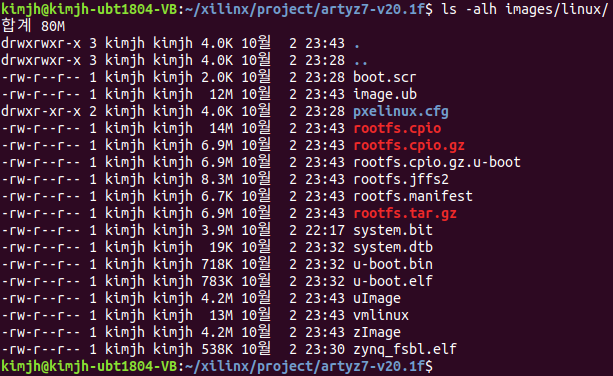
Kernel build 작업이 완료 되고 images/linux directory를 확인해보면 아래와 같은 file 들이 생성 되어 있음
petalinux-package 명령을 통해 boot file 제작
~/xilinx/project/artyz7-v20.1f$ petalinux-package --boot --force --fpga --u-boot --kernel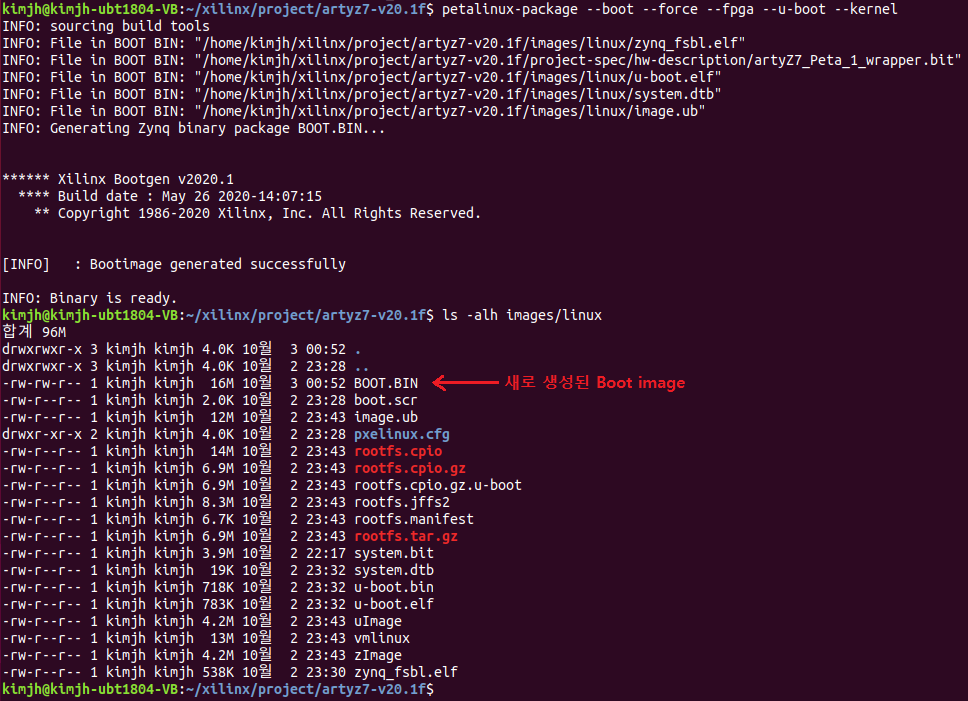
7. PetaLinux image download 및 Board booting
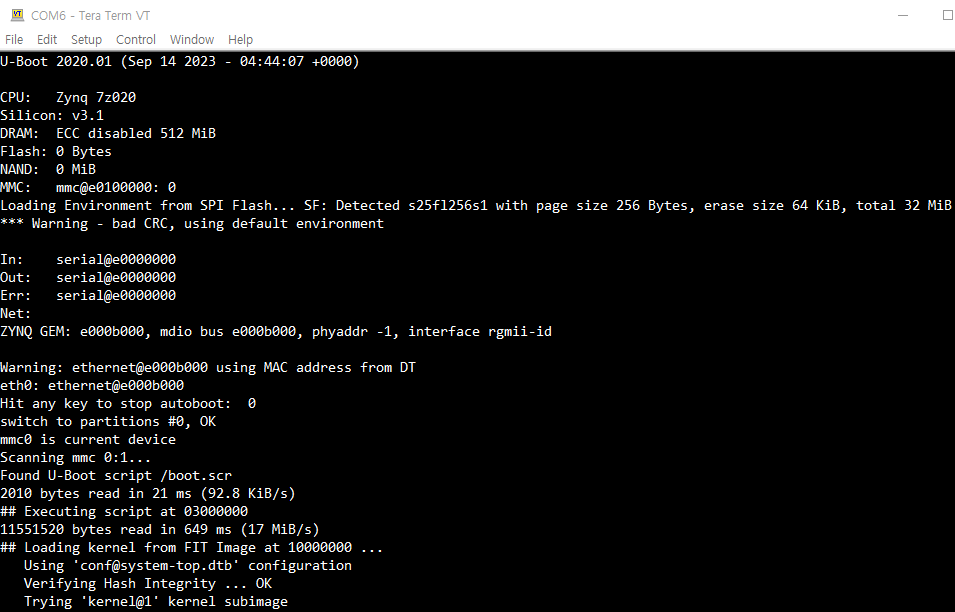
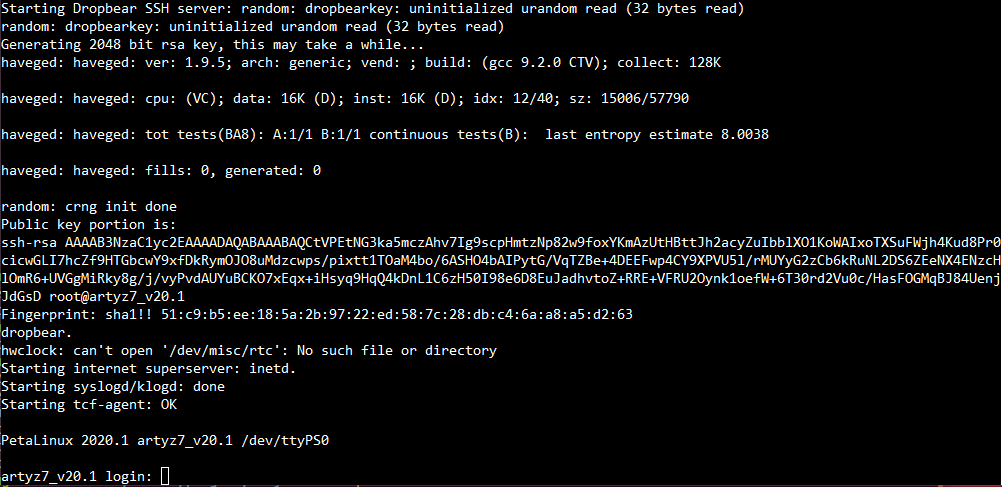
BOOT.BIN, boot.scr, image.ub 3개의 file을 FAT32 형식으로 format된 micro-SD의 /에 복사하고, Arty Z7 board를 SD boot로 맞춘 후 micro-SD memory를 삽입하여 전원을 인가하면 petalinux booting을 확인할 수 있다.
초기 계정과 비번은 root::root
※ 남은 작업은 Boot image를 QSPI용으로 제작 및 Flash download.
[Bootloader] u-boot 로 qspi booting시 확인 사항 (zc706기준) (tistory.com)
[Bootloader] u-boot 로 qspi booting시 확인 사항 (zc706기준)
xilinx에서 나온 zc706보드를 가지고 linux booting시 제일 먼저 다뤄야 할게 bootloader 설정이다.왠만한게 wiki에 나와있다고는 하는데, 안나와있는 내용도 많아서 삽질을 좀 많이 했다. 아무튼 u-boot을 쓰
talkingaboutme.tistory.com
boot.scr을 qspi에 적용하는 방법 : 네이버 블로그 (naver.com)
boot.scr을 qspi에 적용하는 방법
안녕하세요. 오랜만에 글을 작성하게 되었습니다. VIVADO 2020.1 버전부터 u-boot에서 boot.scr을 사...
blog.naver.com
'전자 관련 이야기 > Embedded' 카테고리의 다른 글
| Digilent Arty Z7 - PetaLinux #1 (0) | 2023.09.17 |
|---|---|
| Vitis Compile error (0) | 2023.09.01 |